Chatbots have changed how businesses connect with their customers by offering instant support, automation, and better user experiences. One of the top tools for building smart bots is Botpress, thanks to its open-source platform, easy-to-use interface, and flexible modular setup. In this complete guide, you'll learn how to create powerful, scalable chatbots from start to finish using Botpress Chatbot Integration and AI Chatbot Integration to enhance your business operations.
What is Botpress?
Botpress is an open-source conversational AI platform designed to help developers and enterprises build modern chatbots. It combines the power of natural language understanding (NLU), a visual flow builder, and a modular design to create seamless bot experiences for web and messaging platforms.
Key Features of Botpress:
- Visual Flow Builder: Drag-and-drop UI to design conversation flows.
- Built-in NLU Engine: Supports multiple languages and context-aware intent recognition.
- Extensibility: Easily integrates with APIs, databases, and third-party tools.
- Open-source and Self-hosted: Gives you full control over data and customization.
Getting Started: Build Your First Bot
Once you've successfully logged in using your admin credentials, you're taken to the Botpress Studio, your centralized workspace. Here, you can:
- Create a brand-new bot.
- Import an existing bot and enhance it.
- Take backups of current bots for future use.
Start by naming your bot - choose something relevant and purposeful. Once named, open the bot in the studio to begin development.
Understanding the Botpress Studio Interface
On the left panel of the studio, you'll find various sections essential to bot development:
- Content
- Flow Editor
- NLU (Natural Language Understanding)
- Q&A
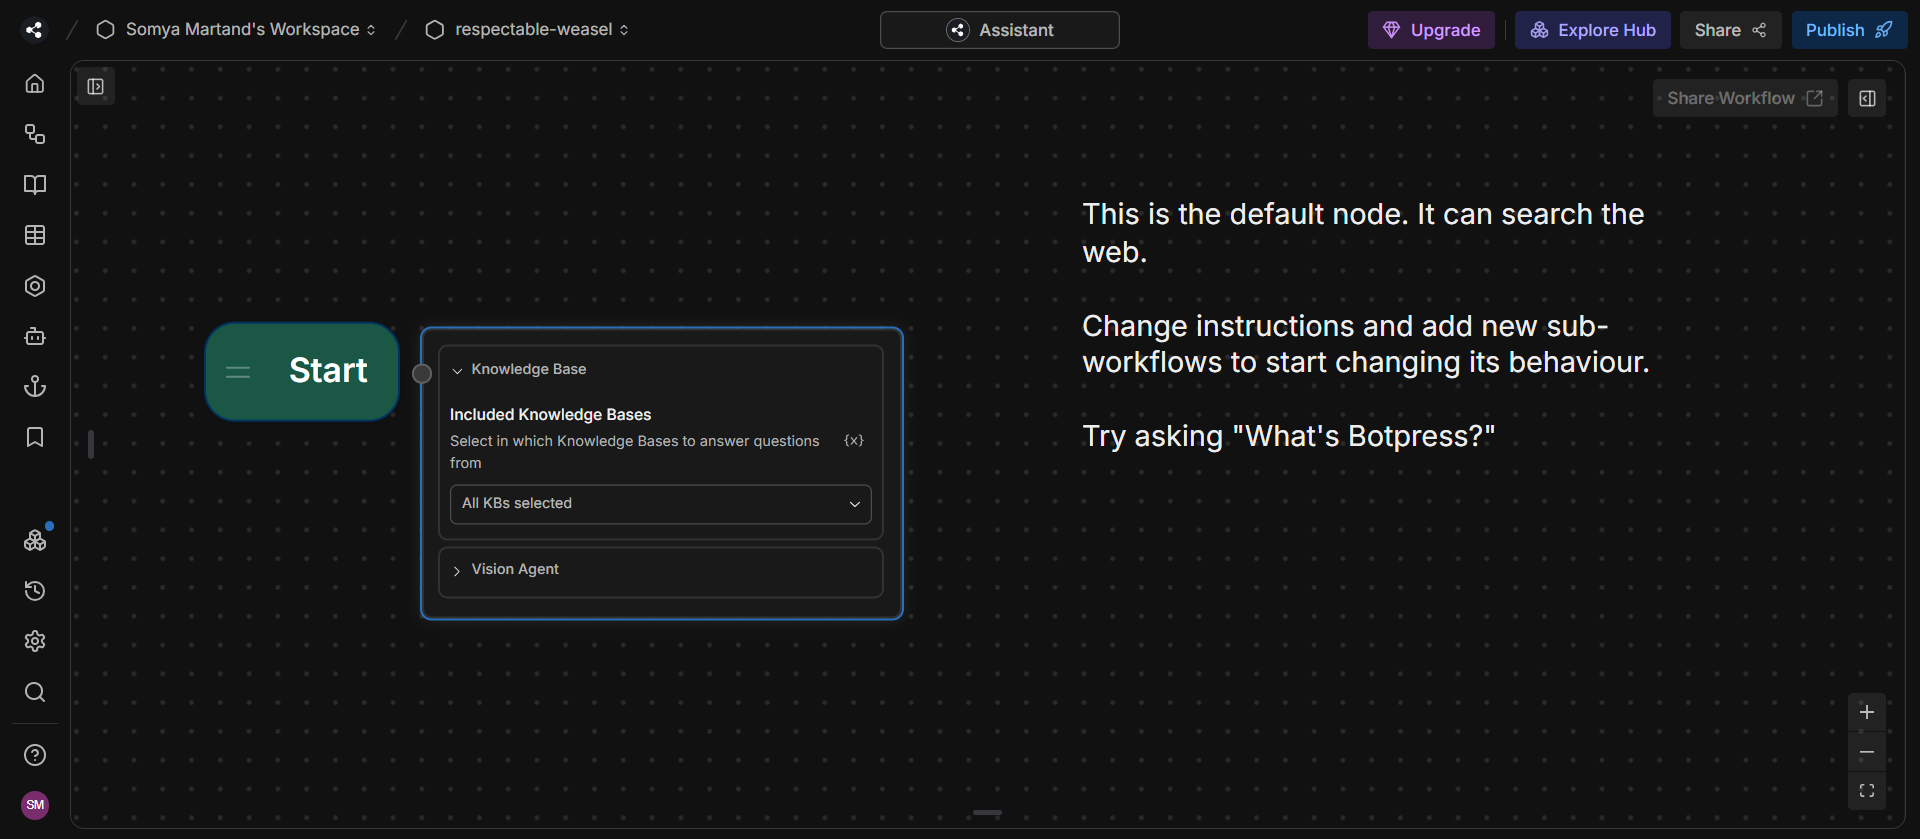
This section allows you to define the responses your bot will deliver. While content can be defined here, it can also be set directly through the Flow Editor.
This is where you design the actual chat flow using a visual interface. It allows drag-and-drop creation of conversational steps. Each node in the flow represents a decision or message point, and transitions between nodes are determined by user inputs and AI predictions.
Botpress uses NLU to interpret user queries in natural language. You define Intents (topics of discussion) and train the system using multiple example phrases for each intent. Over time, the NLU engine adapts and improves in recognizing variations in phrasing and context.
You can also define Entities—specific items like people, places, or codes—that the bot should recognize within user input.
Use this section to test basic bot responses, such as greetings and general knowledge-based answers. It’s ideal for validating how well your bot handles common user queries.
Designing a Workflow: Step-by-Step
To structure your chatbot’s conversations, head to the Workflow Editor. Here, you'll find tools like:
- Nodes
- Choices
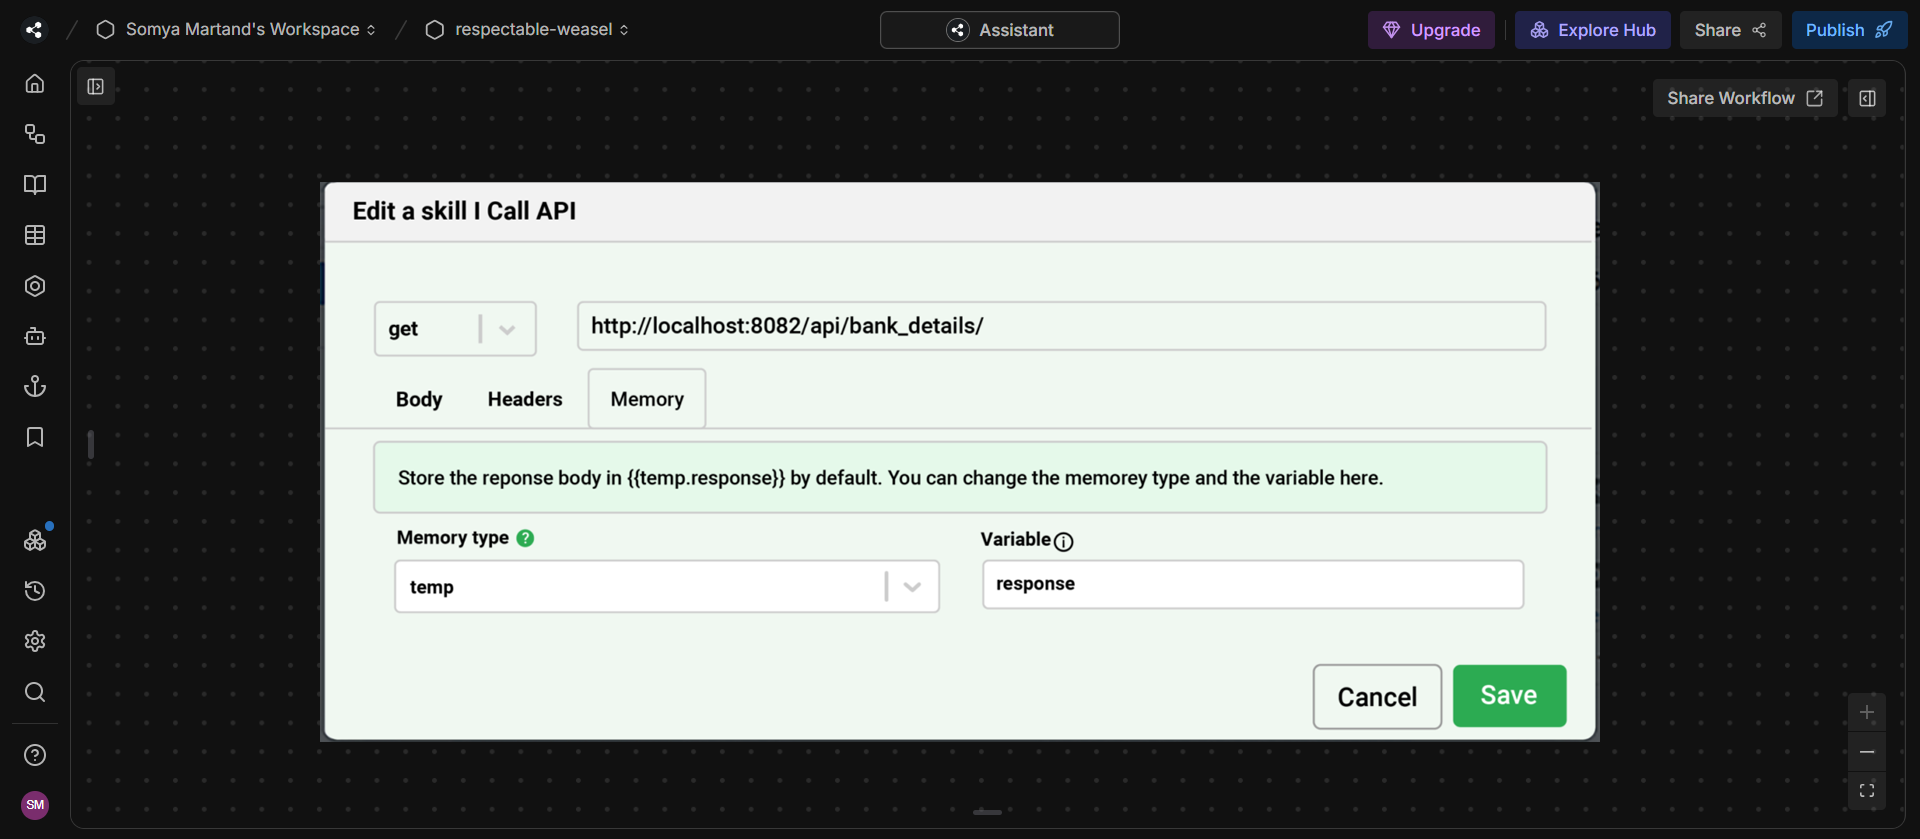
- API Calls
- Slot Filling
- Send Email
What Are Nodes?
Nodes are the core units in a conversation flow. Each session has one active node at any time. As users interact, the conversation transitions from one node to another. If no transition occurs, the session ends.
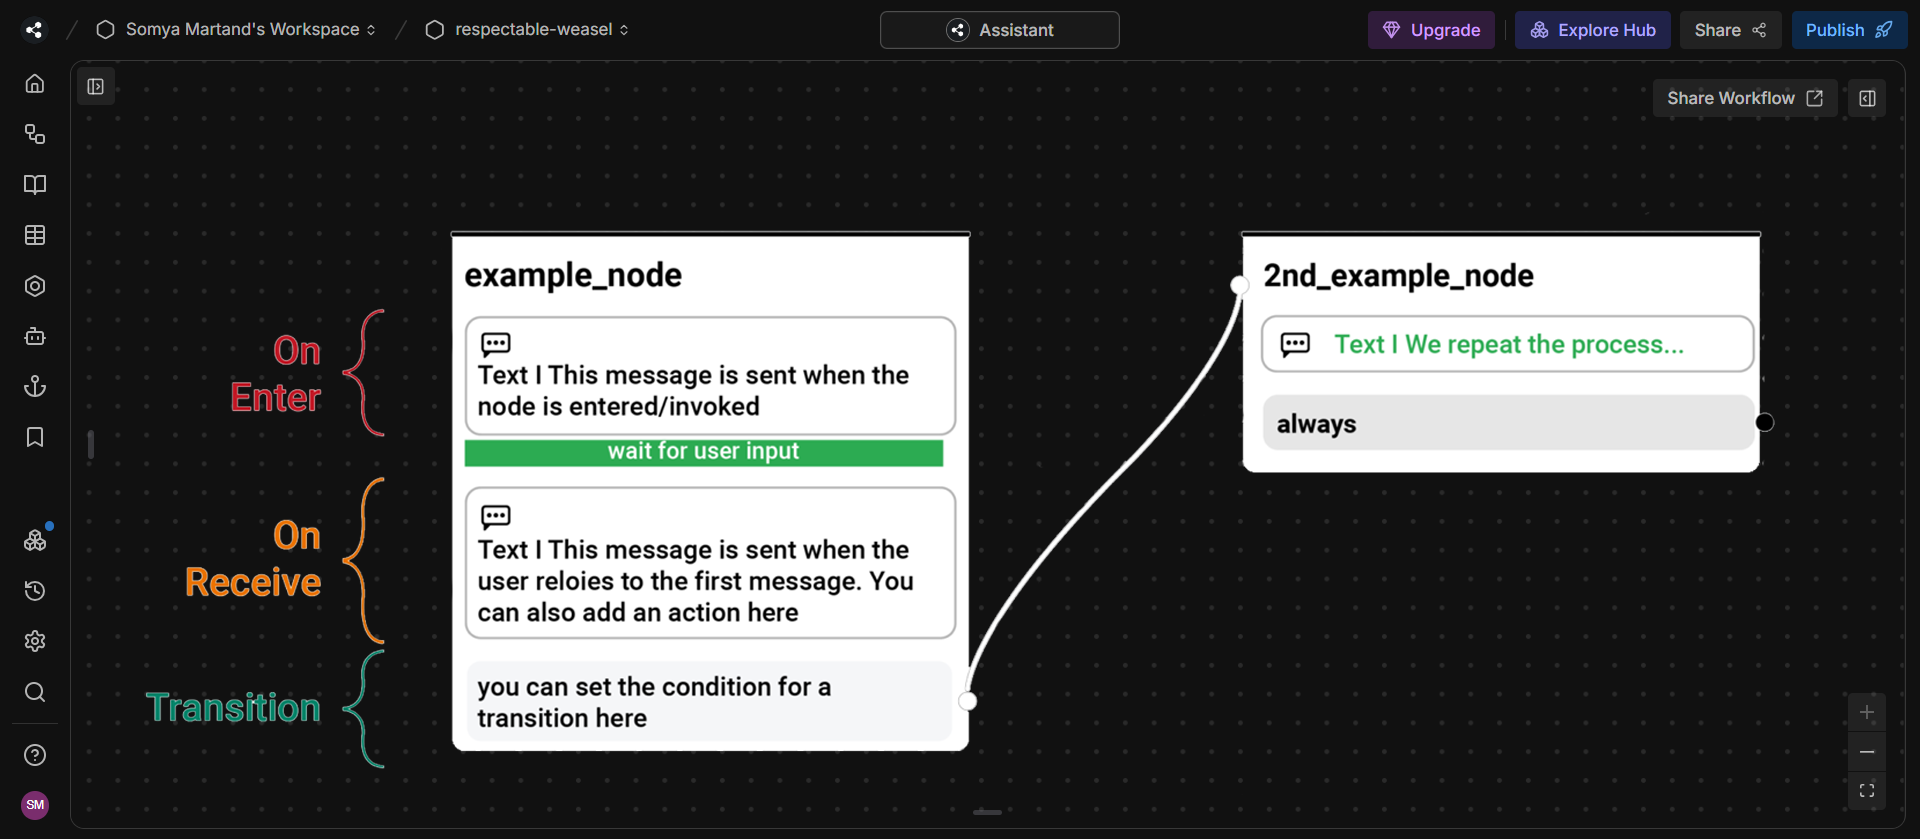
Each node has three stages:
- onEnter: Triggered when the node is reached.
- onReceive: Triggered upon receiving a user message.
- onNext: Defines transition logic to the next node.
Creating Your First Flow
1) Define the Intent
Go to the NLU section and create an intent (e.g., "restaurant"). Think of possible variations of user queries related to that intent, such as "Show me the menu."
2) Add Training Phrases
Train your intent with a wide range of relevant phrases to improve recognition accuracy.
3) Add Entities and Slots
Identify key variables (e.g., IFSC code for a banking bot) and create slots to capture this data. Link related queries to these slots.
4) Design Bot Actions
In the Flow Editor, define responses under each of the three node stages. For example:
- In onEnter, click the + button and type a message or link existing content.
- Define what happens on onReceive.
- Set up transitions based on conditions.
Setting Up Transitions
Transitions are links between nodes, dictating the conversation’s direction. For instance, in an e-commerce chatbot, you might connect a “Not Enough Stock” node to the Start node.
To create one:
- Double-click the Start node.
- Add a transition to the next logical node.
Once your intents, entities, slots, and flow are defined, you can extend functionality by calling external APIs to fetch dynamic data during a conversation.
Testing Your Chatbot
To test your bot:
- Click the Emulator button (top right corner in Botpress Studio).
- Interact with your chatbot in a simulated environment to validate responses and logic.
Embedding Your Bot on a Website
After deploying your bot on a server, you can integrate it into your website. For a ReactJS-based frontend, follow these steps:
Add the Script Tag
<script src="http://localhost:3000/assets/modules/channel-web/inject.js"></script>Replace localhost:3000 with your live server URL.
Initialize the Bot
<script> window.botpressWebChat.init({ host: 'http://localhost:3000', botId: 'bank', hideWidget: false }) </script> This script loads and activates your chatbot on the website.
How to Integrate Botpress with Your Website
Integrating Botpress with your website is a simple process that involves a few key steps. First, you'll need to set up a Botpress instance either on your server or using their cloud solution. Once your Botpress instance is ready, you can integrate it with your website by embedding the Botpress web chat widget into your site. Here's a step-by-step breakdown:
- Set Up Botpress:
- Create Your Chatbot:
- Embed Web Chat Widget:
- Test the Bot:
Download and install Botpress from their official website, or use their hosted solution.
Using the Botpress interface, design your chatbot flows and personalize them to suit your business needs.
After building your bot, you’ll get an integration snippet that you can embed into your website’s code.
Once integrated, it’s important to test the chatbot on your website to ensure everything is working correctly.
With these steps, you'll have a fully functional chatbot that can assist your visitors 24/7.
Botpress API Integration Guide
Botpress offers a powerful API that allows you to integrate the chatbot with your systems and customize its functionality. The Botpress API integration guide provides all the necessary information to connect your Botpress instance with external systems such as CRM, ERP, or support tools. The API allows seamless data exchange, making your chatbot more efficient in handling specific tasks like retrieving customer information or performing backend operations.
Botpress WhatsApp Integration
One of the most popular communication channels today is WhatsApp. Botpress WhatsApp integration enables you to reach customers directly through their preferred platform. By integrating Botpress with WhatsApp, your chatbot can handle queries, send notifications, and even automate customer support on the WhatsApp platform. This feature can be set up using the Botpress API and requires connecting your WhatsApp Business API to Botpress.
Botpress Custom Module Development
For businesses that require specific functionality beyond the standard chatbot features, Botpress custom module development is an excellent option. You can develop custom modules to add unique features, such as advanced natural language processing (NLP) capabilities, machine learning models, or specific integrations with third-party services. Custom module development allows you to fully tailor the Botpress platform to your exact business requirements, ensuring a personalized experience for both you and your customers.
Case Study: AI Chatbot for eCommerce Using Botpress
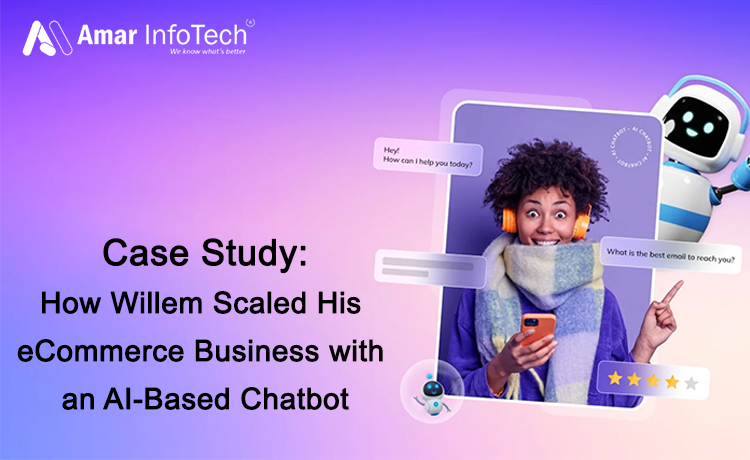
One notable real-world implementation of Botpress in action is the Willem eCommerce AI Chatbot, developed by Amar Infotech. This project showcases the powerful potential of Botpress when combined with custom business logic and conversational AI for the retail industry.
Project Highlights:
Client:
Willem, an eCommerce business seeking 24/7 intelligent customer engagement.
Objective:
Automate product inquiries, support, and personalized recommendations for online shoppers.
Solution:
Using Botpress, a multilingual AI-powered chatbot was developed that:
- Guides users through product categories.
- Handles customer queries using a custom-trained NLU model.
- Integrates with the client’s product database via APIs.
- Automates common support tasks such as order tracking, returns, and FAQs.
Key Benefits Achieved:
- Reduced customer support load by over 40%.
- Improved user engagement with 24/7 support.
- Increased conversions through personalized interactions.
This case study demonstrates how Botpress can be customized to fit unique industry needs, showcasing a practical example of how businesses can leverage conversational AI to boost efficiency and customer satisfaction.
You're Just Getting Started
Congratulations! You've successfully built and deployed your first chatbot using Botpress. However, chatbot development doesn't stop here. You can further enhance your bot’s capabilities by:
- Continuously training it with new phrases.
- Adding more intents and workflows.
- Monitoring user interactions and refining the experience.
Botpress supports ongoing learning and model updates to create truly intelligent conversational agents.
Best Practices for Botpress Development
- Modular Design: Organize conversation logic using subflows.
- Reusability: Use shared actions and responses.
- Version Control: Use Git to track changes and collaborate.
- User Context: Leverage memory and variables for personalized experiences.
- Analytics: Track usage patterns to optimize flows.
Common Use Cases
- Customer Support: Answer FAQs and resolve issues.
- Appointment Scheduling: Collect details and integrate calendars.
- E-commerce: Guide users with product suggestions and order info.
- HR & Internal Tools: Automate employee onboarding and support.
Final Thoughts
Botpress is a great tool for building smart chatbots. It’s flexible and lets developers create anything from a basic FAQ bot to a full-featured assistant for businesses. You can control how the chatbot talks, connects to your data, and works with other systems.
Now that you’ve gone through this guide, you’re ready to start building your own chatbot with Botpress.
Need help with your AI chatbot or want to integrate Botpress into your business?
Contact Amar Infotech – Our experts are here to support your chatbot development journey!
Recent Blog
CakePHP to Laravel Migration: Boost Performance & Scalability
IT Services for Hospitality & Tourism in Phoenix
How to Make a Travel App Like Almosafer: Features, Cost & Best Practices
AI GTM Copilot: The Future of Marketing, Simplified (More)
Top 6 No-Code Agent Builders for AI-Powered Automation (More)
Services
Build Your Agile Team Today..
Inquiry Now